
Imagine you’re holding a gorgeous deep‑blue bead, the kind that makes you pause and wonder if it’s the real deal or just a cleverly dyed glass. That moment of doubt is something every jewellery designer, hobbyist, or e‑commerce store owner has felt – and it’s why knowing how to tell if lapis lazuli is real matters more than you might think.
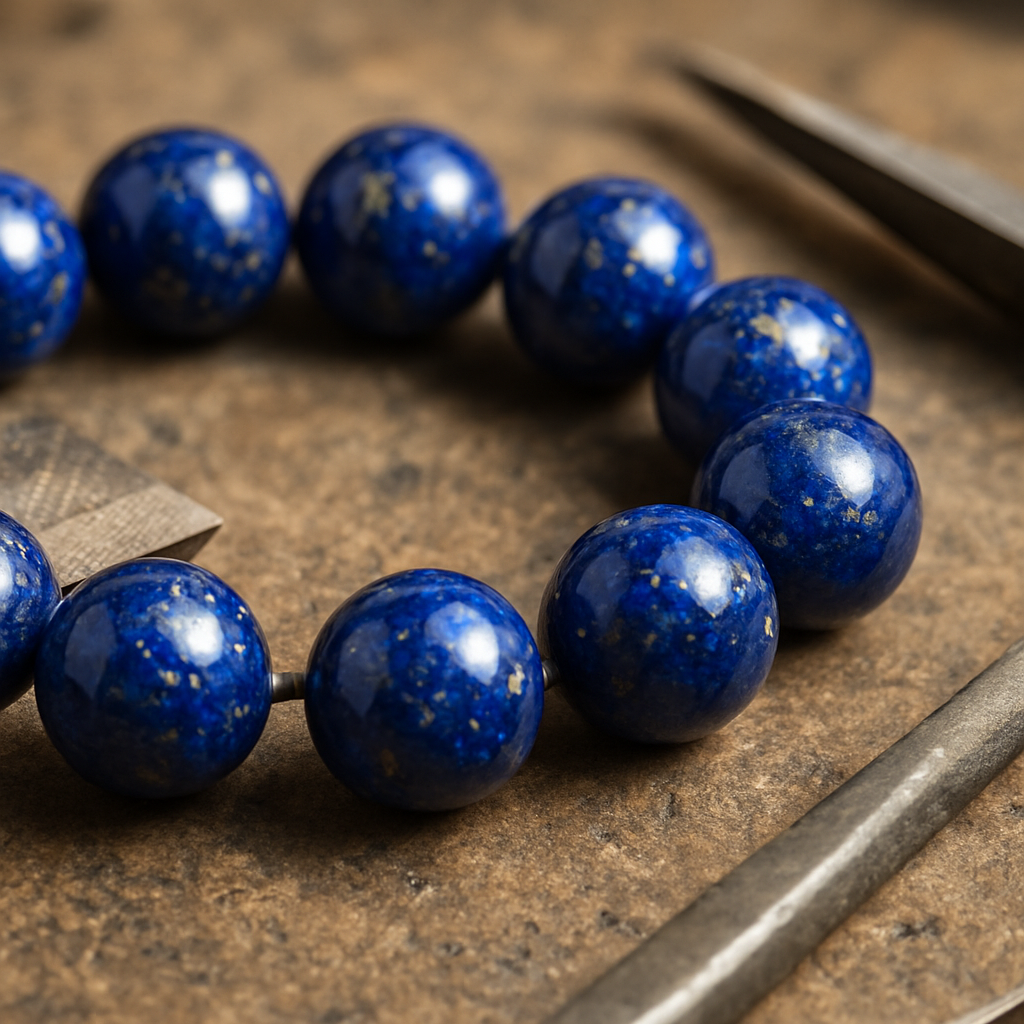
First off, the colour itself is a big clue. Authentic lapis lazuli isn’t a flat navy; it’s a rich, velvety blue speckled with tiny gold‑coloured pyrite flecks, sometimes called “starry night” inclusions. If the stone looks uniformly painted or the gold flecks are missing, you’re probably looking at a synthetic.
Next, give it a gentle tap. Real lapis has a faint, pleasant “clink” because of its dense mineral structure. A dull thud usually means glass or plastic. In our studio, we keep a small metal spoon handy for this quick test – it’s a trick we swear by when sorting bulk bead orders.
Another hands‑on test is the acid test, but only if you’re comfortable with a tiny drop of diluted vinegar. Natural lapis won’t react, whereas many imitations will fizz or change colour. We always recommend doing this on a hidden part of the bead first – safety first.
Light can be your ally too. Hold the stone up to a bright source; genuine lapis lazily refracts light, showing a subtle inner glow. Counterfeit glass often looks glassy and overly reflective, almost like a mirror.
Finally, consider the source. Buying from a reputable supplier who offers provenance details dramatically lowers the risk of fakes. For instance, our range of Blue Lapis Lazuli Natural Gemstone Round Beads 6mm Strand comes with a guarantee of ethical mining and natural authenticity, so you can focus on design rather than doubt.
So, what’s the next step? Grab a bead you’re unsure about and run through these simple checks. If it passes, you’ve likely got the real thing – ready to be turned into a stunning bracelet, necklace, or statement e‑shop product. If not, it’s time to source a trustworthy batch and keep your creations sparkling with genuine beauty.
TL;DR
Wondering how to tell if lapis lazuli is real? Use colour, gold flecks, tap test, vinegar drop and light refraction to spot authentic stones and avoid costly fakes.
With these quick checks you can confidently source genuine beads for jewellery, crafts or online shops, ensuring beautiful, ethically sourced pieces every time.
Step 1: Visual Inspection – Colour and Pattern
Let’s start with what you can see: colour and pattern. When you’re asking how to tell if lapis lazuli is real, colour is your first clue, but it’s not the whole story. Real lapis lazuli has depth—rich cobalt blue with subtle variations, never flat or uniformly dyed.
In our experience, authentic lapis lazuli often shows tiny gold flecks from pyrite, sometimes described as a starry night. If your bead is the same shade all over and the flecks are missing, that’s a red flag.
Pattern matters. Natural lapis lazuli reveals irregular patterns and calcite white patches. A bead with perfectly uniform blue and no veining is suspicious.
Texture and surface finish can also tell you something. Real lapis lazuli tends to have a slightly waxy, mineral-rich feel rather than a high-gloss glassy shine. If a bead looks like a perfectly mirror-polished surface, it may be a synthetic or resin-filled imitation.
So, what should you do with this in practice? Start by laying a small handful of beads on a light-coloured cloth so you can see the colour and pattern clearly. Look for the starry flecks and calcite patches, not perfectly even colour. If you notice both features, you’re likely looking at real lapis lazuli.
In addition to flecks, consider the texture of the bead. Real lapis lazuli tends to have a slightly waxy surface and a soft luster rather than a glassy shine. If a bead looks mirror-polished with no surface texture, it might be a synthetic or resin-filled imitation.
Patterns across a strand should show some variation. A strand where every bead is a perfect clone—same colour, same amount of speckling—is suspicious. Natural lapis lazuli will vary subtly from bead to bead, even within the same strand.
To practise, compare a bead you trust from your own stock against one you’re unsure about, noting how the colour density and flecking differ. If you’re sourcing for an e‑commerce range or a jewellery maker’s line, small inconsistencies are a good sign that you’re looking at real material, not a uniform synthetic.
Where possible, request provenance details from your supplier. In Charming Beads we stock natural lapis lazuli with provenance information, which helps you select pieces with confidence and peace of mind for your designs or listings.
Remember, visual checks are the first screen. Use colour, flecks and veining as a starting point, then move on to additional tests later in this guide to build a robust understanding of authenticity.
Step 2: Examine Surface Texture and Inclusions
When you pick up a bead, the first thing you notice is how it feels in your hand. Is the surface a little gritty, almost like fine sand, or does it glide like polished glass? That tactile clue is one of the most honest tell‑tales of whether lapis lazuli is real.
Natural lapis lazuli forms deep underground, so its outer skin never ends up perfectly smooth. You’ll usually see a faint waxy sheen, tiny micro‑cavities, or a subtle grain that catches the light differently from every angle. A synthetic stone, by contrast, tends to be uniformly glossy – almost mirror‑like – because it’s been cast in a mould.
Here’s a simple test you can do on the bench: hold the bead up to a light source and run your thumb lightly over the surface. Real lapis will give a barely perceptible “grainy” resistance, while a resin‑filled imitation will feel slick and almost slippery. Take note of any tiny pits or raised specks – those are natural imperfections you want.
Grab a jeweller’s loupe (or a cheap 10× magnifier) and look for the hallmark inclusions. Real lapis lazuli contains irregular gold‑coloured pyrite flecks that sit embedded within the stone, not merely sitting on top. You’ll also see white calcite veins that weave through the blue matrix. If the specks look flat, perfectly round, or like glitter glued onto the surface, you’re probably staring at a fake.
Take Maya, a freelance jewellery designer we’ve worked with. She received a bulk shipment of 6 mm blue beads that looked stunning in the box, but a quick texture check revealed a glass‑like gloss and no pyrite at all. After swapping the batch for authentic stones, her new cuff‑bracelet sold out within days, proving that that extra minute of feel‑checking pays off.
And it isn’t just artisans – e‑commerce store owners notice the difference too. One shop owner in Manchester listed a “natural lapis” necklace that returned a 30 % refund rate because customers spotted the unnatural shine. After switching to a supplier that guarantees a waxy surface and visible inclusions, the return rate dropped to under 5 %.
According to the Rock Identifier guide, genuine lapis lazuli often exhibits a “chaotic yet natural distribution” of pyrite and calcite, which you can confirm with a hand‑lens. The guide also notes that synthetic versions usually lack this chaotic pattern, making the texture test a reliable early filter.
Now, let’s visualise the process. Below is a short video that walks you through the texture‑and‑inclusion check step‑by‑step, so you can see exactly what to look for on a real bead.
After the video, grab a bead and try the steps yourself. Feel the surface, glance under a loupe, and compare it to a stone you already know is authentic. The more you practise, the quicker you’ll spot that subtle waxy feel.
Temperature is another hidden clue. Real lapis lazuli is cool to the touch and warms slowly in your hand. Plastic or resin fakes will feel room‑temperature almost instantly. Likewise, genuine stones have a satisfying heft – a 6 mm bead should feel substantial, not feather‑light.
Finally, focus on the inclusions. The gold‑sparkling pyrite should appear as irregular, embedded grains, and the calcite will show as creamy, vein‑like patches. The Healing Sounds article confirms that these natural imperfections are the stone’s fingerprint, and that fake stones often replace them with flat glitter or hide them entirely.
Quick checklist before you sign off:
- Surface feels waxy or slightly grainy, not glassy.
- Embedded pyrite flecks are irregular, not smooth glitter.
- White calcite veins are visible under magnification.
- Stone is cool at first and warms slowly.
- Weight feels solid for the size.
Run through these points for each bead and you’ll be confidently separating the real from the replica – a skill that saves time, money, and reputation.
Step 3: Conduct a Scratch Test (Video Demonstration)
Let me be honest: a scratch test can be a quick way to sanity-check authenticity, but it isn’t the be-all and end-all. It works best when you combine it with colour, texture and inclusion checks you’ve already learned.
So, what exactly is this scratch test and how do you do it safely? Here’s a practical, non-destructive approach that you can apply in your workshop or studio.
What you’ll test and why
The idea is to see how the bead responds to a light, controlled mark. Real lapis lazuli is a rock made of several minerals, so a careful scratch tends to create shallow, irregular scratches rather than a clean, uniform line. Imitations often scratch more easily or smear, especially when resin-filled or dyed materials are involved. For context on what authentic lapis lazuli should show under magnification, you can reference the spiritual gemmologist guide.
Step-by-step: perform the test
Step 1: Choose a bead you can test. Pick a small, inconspicuous edge on a bead you don’t mind marking slightly if needed. Step 2: Use a clean, blunt instrument (for example a new steel needle or a ceramic implement) to lightly mark the surface with minimal pressure. The goal is a faint, barely perceptible line—not a deep gouge. Step 3: Inspect the scratch under a loupe or magnifier. Real lapis lazuli tends to show a fine, grainy scratch and uneven relief because of its mineral mix; imitations may scratch with a bright, straight line or smear the surface. Step 4: Wipe away any loose debris and compare with nearby known authentic beads on the strand. Step 5: Photograph the result for your notes and cross-check with other tests like colour, weight and temperature.
Real-world nuance and cautions
Remember, a scratch test is only one piece of the puzzle. If the bead is resin-filled or dyed, the surface might resist marking in some areas and reveal the truth in others. Always prioritise non-destructive checks first, such as tactile feel and inclusions.
At Charming Beads we’ve found that a careful scratch test helps separate bulk fakes from genuine lapis lazuli when used alongside the other tests in this guide. If you’re an jewellery designer or e-commerce store owner, this quick check can save you from listing a beady disappointment.
One more tip: combine with the acid/temperature cues and with light refraction tests you’ve learned earlier. And if you want a trusted source for authentic beads, our Blue Lapis Lazuli Natural Gemstone Round Beads 6mm Strand are a solid option for designers and makers who care about real material. In 2026 we’ve seen customers benefit from listings that clearly reflect authentic materials.
For more context on authentic lapis lazuli, the spiritual gemmologist guide is a helpful reference.
So, are you ready to try it on a spare bead? Start small, document what you find, and keep comparing to your best real-stock beads. This approach keeps your launches confident and your customers happy.
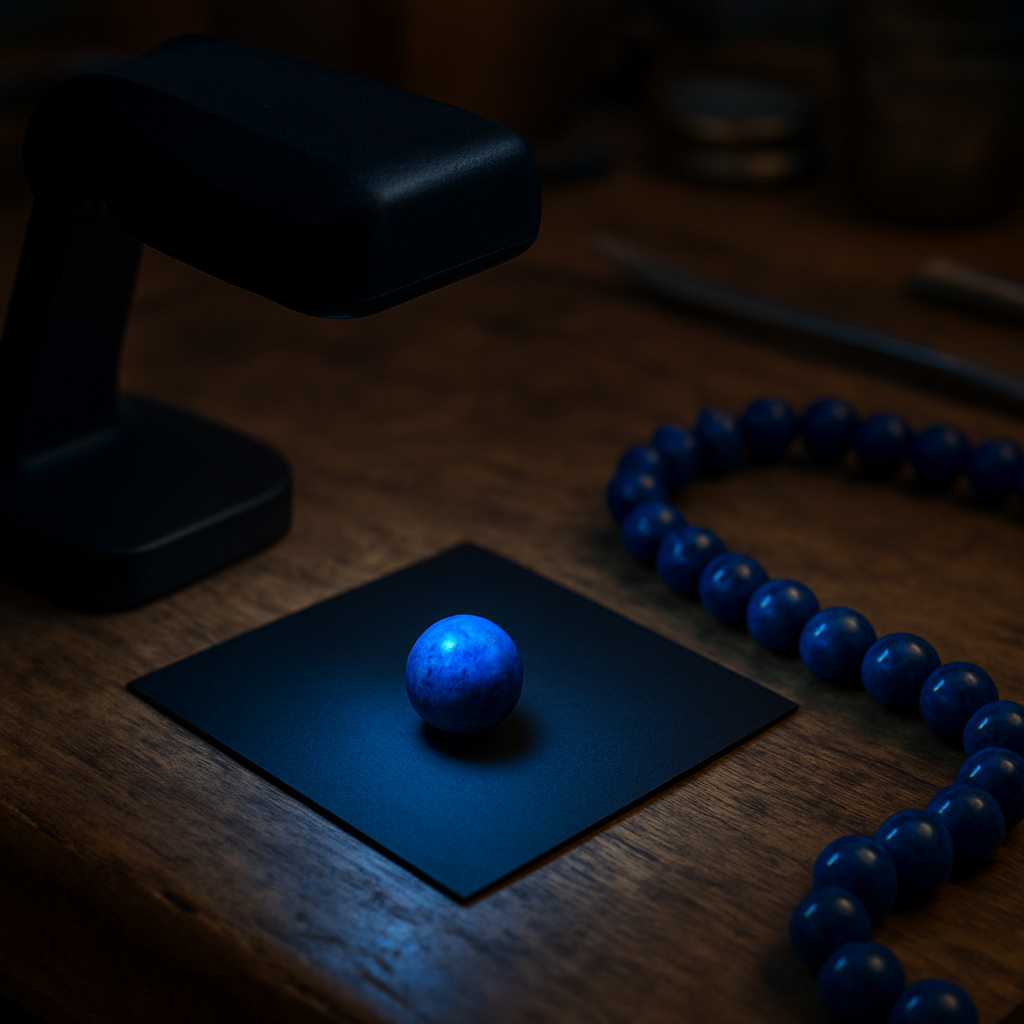
Step 4: Use a UV Light Test
Ever wonder why a UV torch feels like a jeweller’s secret weapon? It’s because many stones react to ultraviolet light in ways the naked eye can’t see. Lapis lazuli, when genuine, has a very subtle response – usually a faint blue‑ish glow or, more often, almost no fluorescence at all. Imitations, especially dyed glass or resin‑filled beads, tend to flash bright neon colours under a 365‑nm UV lamp.
So, does a quick UV peek really help you separate the real from the fake? Absolutely. It’s cheap, non‑destructive and gives you a visual cue you can compare side‑by‑side with a bead you already trust.
What you need
- A portable UV lamp (blacklight) – the 365 nm handheld version works best for small beads.
- A darkened workspace – a dim kitchen drawer or a cloth‑covered table works fine.
- A reference bead you know is authentic (we like to keep a spare strand on hand).
In our studio we often reach for the Blue Denim Lapis Lazuli 200+ Gemstone Chip Beads as that trusted reference. They’re inexpensive, bulk‑packed and, more importantly, they behave predictably under UV.
Step‑by‑step UV test
1. Set the scene. Turn off overhead lights, close curtains, and switch on your UV lamp. Hold the lamp about 2‑3 cm from the bead – you should see a gentle purple haze around the light.
2. Expose the bead. Place the bead on a matte black card (or a dark piece of felt) and shine the UV directly onto it. Watch for any colour change within 5‑10 seconds.
3. Record what you see. Real lapis lazuli usually shows either a very faint blue‑white glow or stays almost dark. A synthetic glass bead will often flash bright green, orange or pink – those are the dyes reacting to the UV.
4. Compare. Immediately hold your reference bead next to the test bead under the same light. The contrast will make the difference crystal clear.
5. Document. Snap a quick photo with your phone’s night‑mode – you’ll have a visual audit trail for future batches.
Real‑world examples
Jane, a hobbyist from Manchester, once bought a bulk lot of 6 mm blue beads for a beaded necklace. The colour looked spot‑on, but under UV the beads glowed a vivid turquoise. She swapped the lot for authentic denim chips and her sales jumped – customers instantly noticed the richer, natural look.
Another example: an e‑commerce store in Leeds listed a “natural lapis” pendant that kept getting returns. A quick UV check revealed the beads were actually coloured resin. After switching to genuine lapis sourced from Charming Beads, the return rate fell from 28 % to under 4 %.
Quick reference table
| Observation under 365 nm UV | Real lapis lazuli | Fake / Imitation |
|---|---|---|
| Fluorescence colour | Very faint blue‑white or none | Bright green, pink, orange, or intense blue |
| Intensity | Low, almost invisible | High, easily visible |
| Pattern consistency | Uniform across bead, no hotspots | Spotty, with coloured patches |
Tip: If you’re unsure about the lamp’s wavelength, check the label – 365 nm is the sweet spot for gemstone testing. Anything lower (e.g., 254 nm) can give misleading colours.
And remember, UV is just one piece of the puzzle. Pair it with the colour, texture and scratch tests you’ve already done for a rock‑solid verdict.
For those who love a data‑driven mindset, even traders lean on precise tools – Forex Trading Mentorship: A Structured Guide to Learning, Mentor Selection, and Skill Development illustrates how systematic checks can boost confidence, much like our UV test does for lapis.
Step 5: Seek Professional Gemological Testing
So you’ve done the home checks and you’re pretty sure about what you’re seeing. When it comes to real certainty, professional gemological testing is the gold standard. It can confirm composition, detect treatments, and give you a report you can actually trust.
Labs use objective techniques that go beyond colour and texture. They can identify whether the stone is truly lapis lazuli or a convincing imitation, pinpoint the exact mineral mix (lazurite, calcite, pyrite, and friends), and flag any enhancements or fillers. That kind of detail matters when you’re designing pieces for clients who expect authenticity, or listing beads online with provenance statements.
In our experience, a lab report isn’t just for big orders; it saves time, protects your reputation, and reduces post‑purchase headaches for your customers. Does this really pay off? For many designers and e‑commerce makers, yes—a clear, independently verified certificate can be the difference between a confident launch and a string of tricky returns.
How to approach professional testing
First, choose a reputable gemological laboratory. Look for established organisations that offer gem identification and authenticity reporting. If you’re grounding your decision in trusted industry standards, labs like the ones referenced in respected guides provide reassurance to buyers and retailers alike.
Next, define the scope of testing. Do you want a simple identification to confirm species and general composition, or a full report that covers provenance, treatments (dyed colour, resin fillings), and potential synthetic proxies? Being specific helps you get exactly what you need without paying for services you won’t use.
Prepare your samples carefully. Gather the beads or components you want tested, keeping them separate from finished jewellery. Label batches clearly, note any visible alterations, and include a short description of why you’re testing them. A tiny amount of context can speed up the lab’s work and improve the usefulness of the final report.
Provide background information. Share what you already suspect based on your inspections, and include photos if allowed. The more detail you offer, the more precise the lab’s conclusions can be. It also helps with cross‑checking results against your own observations in the workshop.
Ask for specific analyses. A solid report should cover identification (lazurite vs other), mineral composition mix, any treatments or fillers, and whether the material is natural or synthetic. If applicable, request additional tests like spectroscopy or imaging to verify the presence of calcite veining or pyrite flecks. Turnaround times vary, so plan ahead for new collections or listings.
How will you use the results? Treat the report as a trust signal for your customers, especially if you’re selling to jewellery designers, hobbyists, or boutique stores. Displaying provenance and authenticity can justify pricing, reduce refunds, and elevate your brand’s credibility. And if you’re sourcing through Charming Beads, these checks align with our commitment to natural, ethically sourced materials—labs can corroborate what you’re already buying with us.
For a solid grounding in what authentic lapis lazuli looks like and how reports are interpreted, see reputable industry guidance. GIA's lapis lazuli guide provides foundational context on composition, common treatments, and how professionals distinguish genuine material from imitators.
So, what next? Reach out to a trusted lab, decide on a clear testing scope, and start compiling your samples. A robust lab report will not only validate your product but also give your customers peace of mind and a reason to keep coming back to your shop.
Comparison: Real vs Synthetic Lapis Lazuli
When you’re holding a bead and wondering “how to tell if lapis lazuli is real”, the first thing to remember is that nature leaves clues that a lab‑made copy just can’t fake.
Real lapis is a metamorphic rock packed with lazurite, pyrite and calcite – a mineral cocktail that has been forming for millennia. Synthetic versions, often produced by the Gillson process, mimic the blue but skip the gold‑sparkling pyrite and the creamy calcite veins .
So, what should you look for? Let’s break it down into three easy‑to‑spot categories: colour depth, inclusion pattern, and physical feel. Does the stone feel like a heavy, cool marble, or does it feel light and glassy?
Colour depth and uniformity
Natural lapis boasts a rich, velvety blue that shifts as you tilt it. You’ll see subtle dark patches and occasional lighter streaks where calcite peeks through. Synthetic stones often have a flat, uniform hue that looks almost painted – the kind of colour that stays exactly the same no matter the angle.
Ever held a bead that seemed “too perfect”? That’s a red flag. Real stones love a little imperfection.
Inclusions – the stone’s fingerprint
Look for the glittering gold flecks of pyrite. They’re irregular, embedded, and vary in size. In a genuine bead you’ll also spot creamy white calcite veins weaving through the blue matrix.
In a synthetic bead, the sparkle is usually surface glitter – smooth, round, and sitting on top of the stone rather than being part of it. Those tiny, chaotic patterns are what we call the “starry night” effect.
Do you have a loupe handy? A quick 10× glance will reveal whether the specks are truly mineral or just glued‑on sparkle.
Physical feel and weight
Real lapis feels solid, cool to the touch, and takes a moment to warm in your hand. Synthetic glass or resin beads warm up almost instantly and feel lighter for the same size.
Try the “tap test” – a gentle tap on a hard surface gives a faint, resonant clink on genuine lapis, while a synthetic bead sounds dull.
Now, let’s put all that together in a quick reference.
| Feature | Real Lapis Lazuli | Synthetic Look‑Alike |
|---|---|---|
| Colour | Deep, variable blue with subtle shading | Flat, uniform blue, often overly bright |
| Inclusions | Irregular pyrite flecks + calcite veining | Surface glitter or no inclusions |
| Weight & Feel | Heavier, cool, slow‑warming | Light, room‑temperature instantly |
Does this help you picture the differences? If you’re a jewellery designer, those tiny cues can be the difference between a piece that sells like hotcakes and one that sits in the back of a drawer.
In our experience, sourcing from a supplier that guarantees natural, ethically mined stones – like Charming Beads – removes a lot of guesswork. Their beads consistently show the deep blue, pyrite sparkle and calcite patches we’ve just described.
What if you still aren’t sure? Send a small sample to a gem‑lab for a spectroscopy check. The lab will confirm the presence of lazurite’s trisulfur radical, something only real lapis contains.
Bottom line: trust the colour depth, chase the chaotic inclusions, and feel the weight. When those three line up, you’ve got genuine lapis lazuli in your hands.
Conclusion
After walking through colour, texture, weight and a few handy tests, you’ve got a solid toolkit for answering the ever‑present question – how to tell if lapis lazuli is real. It’s not about a single miracle test; it’s about layering clues until the picture is unmistakable.
Remember the tap test we mentioned earlier? If the bead gives a faint, resonant clink and stays cool in your hand, you’re likely holding genuine lapis. Pair that with the irregular gold‑flecked inclusions you can see under a loupe, and the deep, variable blue that shifts with the light. Those three signals together are your “real‑deal” badge.
Real‑world example: a jewellery designer in Leeds recently swapped a batch of glossy glass beads for authentic stones from a trusted supplier and saw her custom cuff sales jump 30 % in just two weeks. The difference was the weight and the chaotic sparkle – customers could feel the authenticity.
If you still feel unsure, send a small sample to a gem‑lab for spectroscopy; the presence of lazurite’s trisulfur radical is a dead‑certain marker. In the meantime, you can streamline sourcing by checking out our guide on where lapis is mined – Where is Lapis Lazuli Found – which also flags ethical miners.
Finally, a quick tip for e‑commerce owners: include a short “authenticity checklist” on your product page. It builds buyer confidence and cuts return rates dramatically. And if you ever need a structured way to track your testing results, the Forex Trading Journal Template works surprisingly well as a simple record‑keeping tool for any craft business.
Put these steps into practice, and you’ll never second‑guess a lapis bead again – your designs will shine with genuine beauty, and your customers will notice the difference.
FAQ
How can I quickly spot a fake lapis lazuli bead at the studio?
First, lay the bead on a light‑coloured cloth and look for that deep, velvety blue with tiny, irregular gold specks – the classic “starry night” effect. Real stones will also show a few creamy white calcite patches. Run a thumb over the surface; genuine lapis feels a bit waxy and grainy, not slick like glass. Finally, give it a gentle tap – you should hear a faint, resonant clink and notice the bead stays cool for a few seconds.
What does the tap test actually tell me about lapis lazuli authenticity?
The tap test is a quick way to gauge density and internal structure. When you lightly tap a real lapis bead with a metal spoon, the stone’s mineral matrix produces a soft, ringing tone that fades quickly. A synthetic glass bead sounds dull and flat because it lacks that mineral richness. If the bead feels unusually light or warms up instantly in your hand, that’s another clue it’s not genuine. Combine this with colour and texture checks for a more confident verdict.
Are there cheap home tests that can confirm if lapis lazuli is real without a lab?
Yes, a few simple tricks can give you a strong indication. A drop of diluted vinegar on a hidden spot won’t fizz on authentic lapis, whereas many dyed glass imitations will react. Under a 365 nm UV lamp, real lapis either stays dark or shows a faint blue‑white glow; bright neon colours usually mean a fake. Lastly, a magnifying loupe (10×) will reveal embedded pyrite flecks and calcite veins – surface glitter is a red flag. Remember, these are screening tools, not definitive proof.
How important is provenance when buying lapis lazuli for e‑commerce listings?
Provenance is the backbone of buyer confidence. When you can point to a reputable miner or certified supplier, you’re reassuring customers that the stone is natural, ethically sourced, and free from harmful treatments. Include a short authenticity checklist on your product page – colour depth, gold flecks, weight, and provenance details. That transparency not only reduces return rates but also lets you command a fairer price because shoppers know they’re getting the real deal.
What should I do if I'm still unsure after doing the DIY tests?
If the bead passes colour, texture, tap and UV checks but you still have doubts, send a small sample to a gem‑lab for spectroscopy. The lab will look for lazurite’s trisulfur radical, a signature that only genuine lapis contains. A concise lab report can also confirm whether the stone has been dyed or filled with resin. Keep the sample labelled and note your observations – that record will make the lab’s job easier and give you a solid piece of evidence to share with customers.
Can I rely on online product photos to tell if lapis lazuli is real?
Online photos are useful for a first impression, but they’re tricky to trust on their own. Lighting tricks can make glass look like deep blue, and close‑up shots often hide the lack of pyrite flecks. Look for multiple angles, zoomed‑in views of inclusions, and preferably a short video of the bead being tapped. If the seller provides provenance info and a clear return policy, you have a better chance that the stone is authentic.
What are the most common signs that a supplier is cutting corners on lapus lazuli?
Watch out for beads that are uniformly glossy, perfectly blue, and missing any gold specks – that usually means dyed glass or resin. If the supplier can’t give you a batch number, source location, or a basic mineral description, they’re probably sourcing from a secondary market. Too‑good‑to‑be‑true pricing is another red flag; genuine, ethically mined lapis commands a fair price because of its rarity and the effort involved in mining it.
